Step-by-Step Guide to Printing with a 4 Color Silk Screen Printing Machine
Choosing the Right Materials
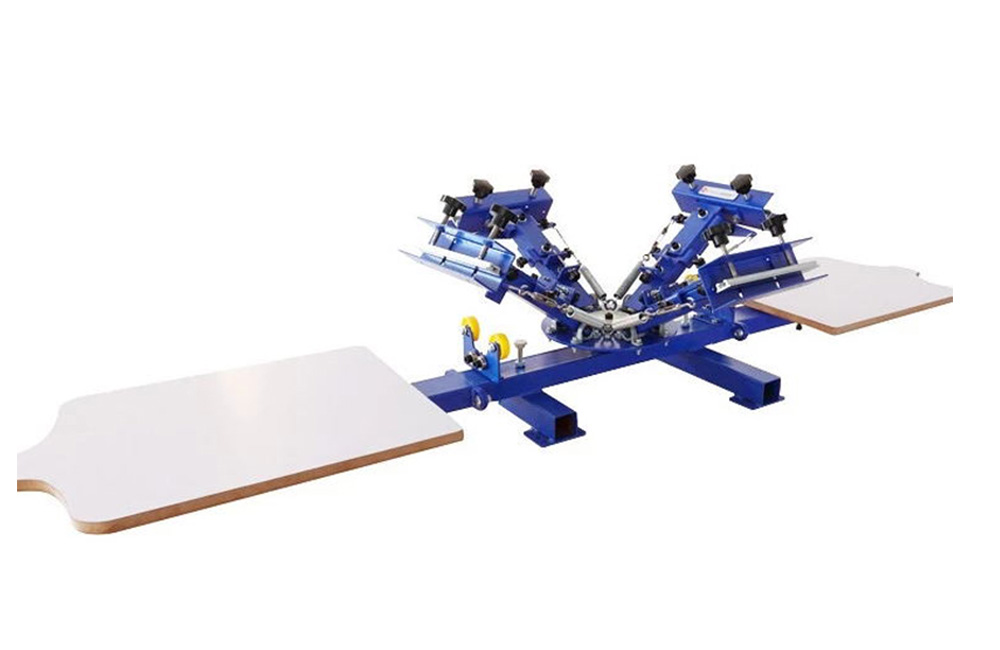
Silk screen printing is a popular method for creating high-quality prints on various surfaces, including fabric, paper, and plastic. One of the key components of silk screen printing is the use of a 4 color silk screen printing machine. This type of machine allows for the printing of designs with up to four different colors, resulting in vibrant and detailed prints.
When it comes to printing with a 4 color silk screen printing machine, choosing the right materials is crucial for achieving the best results. The first step in the process is selecting the right type of screen mesh. The screen mesh is the material that the design is printed onto, and it comes in a variety of sizes and materials. For most projects, a mesh count of 110-160 is recommended for general printing, while a higher mesh count of 200-305 is ideal for fine detail work.
Next, you will need to choose the right type of ink for your project. There are two main types of ink used in silk screen printing: water-based and plastisol. Water-based inks are environmentally friendly and easy to clean up, but they may not be as durable as plastisol inks. Plastisol inks, on the other hand, are more durable and provide vibrant colors, but they require special cleaning solvents for cleanup.
In addition to screen mesh and ink, you will also need to choose the right type of squeegee for your project. The squeegee is the tool used to push the ink through the screen mesh and onto the printing surface. Squeegees come in a variety of shapes and sizes, so it’s important to choose one that is appropriate for the size and detail of your design.
Once you have selected the right materials for your project, the next step is to prepare the screen for printing. This involves coating the screen with a light-sensitive emulsion and allowing it to dry in a dark room. Once the emulsion is dry, you will need to expose your design onto the screen using a light table or exposure unit. After exposure, you will need to wash out the unexposed emulsion with water, leaving behind a stencil of your design on the screen.
With your screen prepared, it’s time to set up your 4 color silk screen printing machine. Start by securing the screen onto the printing bed and aligning it with the registration marks on the machine. Next, load your chosen ink colors into the corresponding slots on the machine and adjust the squeegee pressure to ensure even ink coverage.
Once everything is set up, you can begin printing your design. Start by flooding the screen with ink and then pulling the squeegee across the screen in a smooth, even motion. Repeat this process for each color in your design, making sure to line up the registration marks between colors for accurate alignment.
After printing, allow the ink to dry completely before heat setting it with a heat press or conveyor dryer. This will ensure that the ink is properly cured and will not wash out or fade over time.
In conclusion, choosing the right materials is essential for successful printing with a 4 color silk screen printing machine. By selecting the appropriate screen mesh, ink, and squeegee for your project, preparing the screen properly, and setting up the machine correctly, you can achieve professional-quality prints with vibrant colors and crisp detail. With practice and attention to detail, you can create stunning prints that will impress your customers and clients.
Pre: Why Proper Registration Is Key to Multi-Color Screen Printing
Next: Why Choose a 4 Color Silk Screen Printing Machine for Your Custom Prints
Tags: