DIY Screen Printing Projects with a 4 Colour 1 Station Setup
Creating Custom T-Shirts with DIY Screen Printing
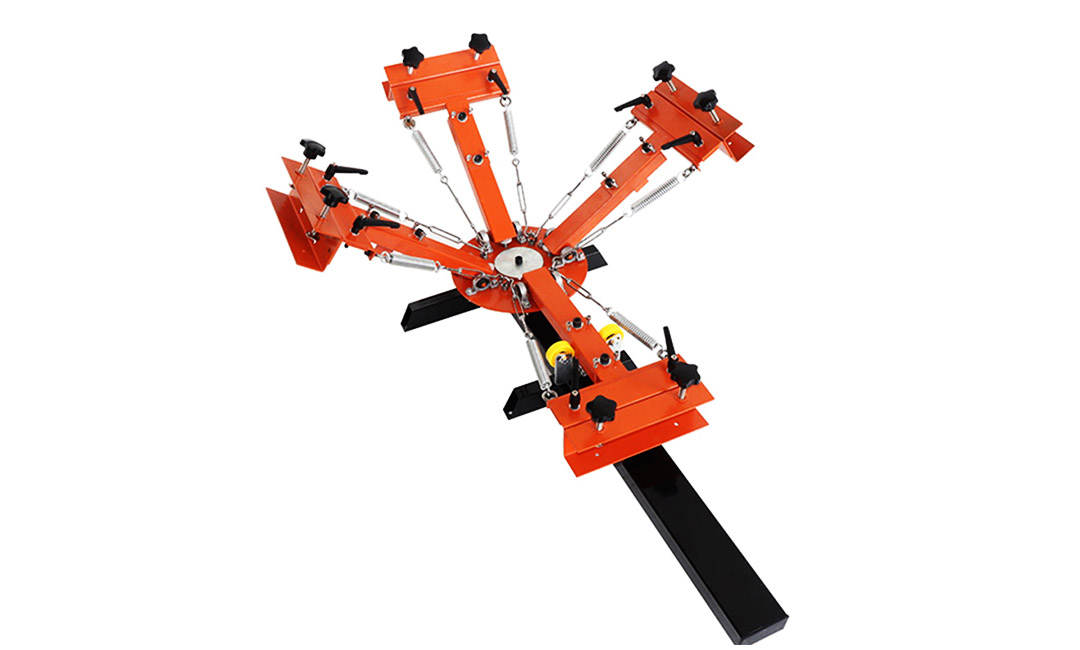
Screen printing is a popular method for creating custom t-shirts and other apparel. With a 4 colour 1 station setup, you can easily create professional-looking designs from the comfort of your own home. This setup allows you to print up to four different colors on a single shirt, giving you endless possibilities for creativity.
One of the key benefits of DIY screen printing is the ability to create unique designs that reflect your personal style. Whether you’re looking to make a statement with a bold graphic or simply want to add a personal touch to your wardrobe, screen printing offers a versatile and cost-effective solution. With a 4 colour 1 station setup, you can experiment with different color combinations and techniques to achieve the perfect look for your custom t-shirts.
To get started with DIY screen printing, you’ll need a few essential tools and materials. In addition to your 4 colour 1 station setup, you’ll need screen printing ink, squeegees, screens, and a design to print. You can either create your own design using graphic design software or purchase pre-made designs online. Once you have everything you need, it’s time to set up your workspace and start printing.
Begin by preparing your screens. Coat the screen with emulsion and let it dry in a dark room. Once the emulsion is dry, expose your design onto the screen using a light table or exposure unit. Rinse the screen with water to reveal your design, then set it aside to dry. Repeat this process for each color in your design.

Next, set up your 4 colour 1 station setup. Attach the screens to the station and load each color of ink into its corresponding screen. Use a squeegee to pull the ink across the screen, transferring your design onto the shirt. Repeat this process for each color in your design, making sure to line up the screens accurately to avoid misalignment.
As you print, be sure to clean your screens and squeegees between colors to prevent mixing and ensure crisp, clean prints. Experiment with different techniques, such as halftones and gradients, to add depth and dimension to your designs. Don’t be afraid to get creative and try new things – screen printing is a versatile medium that allows for endless possibilities.
Once you’ve finished printing, let your shirts dry completely before wearing or washing them. Heat set the ink according to the manufacturer’s instructions to ensure durability and longevity. With proper care, your custom t-shirts will last for years to come, allowing you to showcase your unique style wherever you go.
In conclusion, DIY screen printing with a 4 colour 1 station setup is a fun and rewarding way to create custom t-shirts and express your creativity. With the right tools and materials, you can easily achieve professional-looking results from the comfort of your own home. So why wait? Start experimenting with DIY screen printing today and see where your creativity takes you.
Designing Posters and Art Prints using a 4 Colour 1 Station Setup
Screen printing is a versatile and cost-effective way to create high-quality prints on various surfaces. With a 4 colour 1 station setup, you can easily design posters and art prints at home. This setup allows you to print up to four different colors on your design, giving you the flexibility to create intricate and colorful prints.
To start your DIY screen printing project, you will need a few essential tools and materials. These include a 4 colour 1 station screen printing press, screens, squeegees, ink, and a design to print. You can either create your design digitally or hand-draw it on a transparent film. Once you have your design ready, you can transfer it onto a screen using photo emulsion or a stencil.
When designing posters and art prints with a 4 colour 1 station setup, it is essential to plan your colors carefully. Think about how each color will interact with the others and how they will come together to create a cohesive design. Experiment with different color combinations and test your prints on scrap paper before printing on your final surface.
Once you have your design and colors finalized, it’s time to set up your screen printing press. Make sure your screens are securely attached to the press and that your ink is mixed and ready to use. Load your first color onto the screen and use a squeegee to evenly distribute the ink over the design. Repeat this process for each color, making sure to let each layer dry before adding the next.
As you print each color, pay attention to registration to ensure that your design lines up correctly. Registration is the process of aligning each color layer so that they match up perfectly. Use registration marks on your screens and paper to help guide you in lining up each color accurately.
Once you have printed all of your colors, let your prints dry completely before handling them. You can then trim them down to size and display them as posters or art prints. Experiment with different paper types and textures to see how they affect the final look of your prints.
Designing posters and art prints with a 4 colour 1 station setup allows you to unleash your creativity and create unique and eye-catching designs. Whether you’re a seasoned screen printer or a beginner looking to try something new, this setup offers endless possibilities for creating beautiful prints at home.
In conclusion, DIY screen printing projects with a 4 colour 1 station setup are a fun and rewarding way to create custom posters and art prints. With the right tools and materials, you can bring your designs to life and showcase your creativity. Experiment with different colors, textures, and techniques to see what works best for your projects. So, roll up your sleeves, get your hands dirty, and start printing!
Printing on Tote Bags and Other Fabric Items with Screen Printing
Screen printing is a versatile and cost-effective way to add custom designs to fabric items such as tote bags, t-shirts, and more. With a 4 colour 1 station setup, you can create intricate and colourful designs that will make your items stand out. In this article, we will explore some DIY screen printing projects that you can try at home.
One of the most popular items to screen print on is tote bags. Tote bags are not only practical but also serve as a great canvas for your designs. To start, you will need a blank tote bag, screen printing ink, a squeegee, and of course, your 4 colour 1 station setup. Begin by securing your tote bag onto the printing platen of your setup. Next, prepare your screens with the desired design and colours. Once everything is set up, apply the ink to the screen and use the squeegee to evenly distribute it over the design. Lift the screen carefully to reveal your printed tote bag. Repeat this process for each colour in your design, making sure to let each layer dry before adding the next.
Another fun project to try is screen printing on t-shirts. T-shirts are a staple in everyone’s wardrobe, making them a great canvas for your designs. To start, you will need a blank t-shirt, screen printing ink, a squeegee, and your 4 colour 1 station setup. Secure the t-shirt onto the printing platen and prepare your screens with the desired design and colours. Apply the ink to the screen and use the squeegee to transfer the design onto the t-shirt. Repeat this process for each colour in your design, making sure to let each layer dry before adding the next.

If you’re feeling more adventurous, you can also try screen printing on other fabric items such as pillowcases, tea towels, or even canvas shoes. The process is the same as with tote bags and t-shirts, but the possibilities are endless when it comes to what you can create. Experiment with different designs, colours, and fabrics to create unique and personalized items that reflect your style.
When it comes to screen printing, the possibilities are endless. With a 4 colour 1 station setup, you can create professional-looking designs on a variety of fabric items. Whether you’re looking to add a personal touch to your wardrobe or create custom gifts for friends and family, screen printing is a fun and rewarding hobby to explore. So gather your supplies, unleash your creativity, and start printing today. Who knows, you may just discover a new passion for DIY screen printing.
Pre: How Micro Registration Improves Accuracy in 4 Color 1 Station Screen Printing Press
Next: Step-by-Step Guide to Micro Registration in 4 Color 1 Station Press
Tags: