Best Practices for Screen Printing with a 4 Color 1 Station System
Proper Screen Preparation Techniques
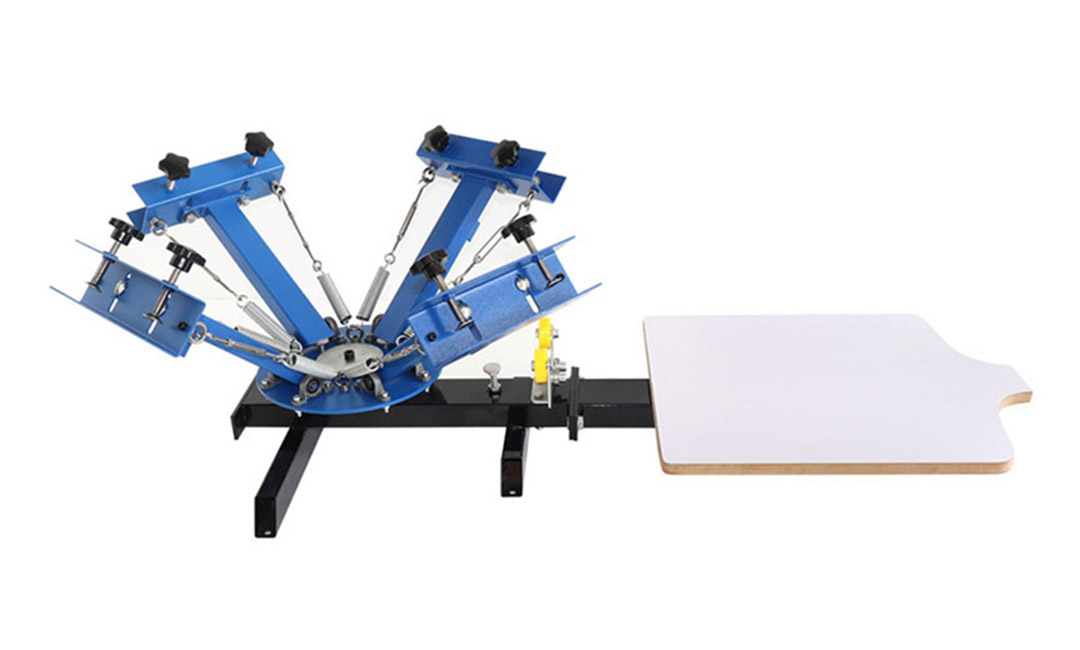
Screen printing is a popular method of printing designs onto various surfaces, such as t-shirts, posters, and other promotional items. One of the most common setups for screen printing is a 4 color 1 station system, which allows for multiple colors to be printed in registration on a single station. However, in order to achieve high-quality prints with this system, proper screen preparation techniques must be followed.
The first step in preparing screens for screen printing is to ensure that the screens are clean and free of any debris or residue. This can be done by washing the screens with a mild detergent and water, and then rinsing them thoroughly to remove any soap residue. It is important to allow the screens to dry completely before moving on to the next step, as any moisture left on the screens can affect the quality of the print.
Once the screens are clean and dry, the next step is to coat them with emulsion. Emulsion is a light-sensitive liquid that is applied to the screens and then exposed to UV light to create the stencil for the design. To coat the screens with emulsion, use a scoop coater to apply a thin, even layer of emulsion to both sides of the screen. Be sure to coat the screens in a dark room or under yellow light, as exposure to white light can cause the emulsion to harden prematurely.

After coating the screens with emulsion, allow them to dry completely in a dark room or under yellow light. Once the emulsion is dry, it is time to expose the screens to UV light to create the stencil. To do this, place the design on a transparency film and lay it on top of the screen. Secure the film in place with tape or a vacuum frame, and then expose the screen to UV light for the appropriate amount of time.
After exposing the screens to UV light, it is important to wash out the unexposed emulsion to reveal the stencil. This can be done by using a pressure washer or a garden hose with a spray nozzle to gently wash away the unexposed emulsion. Be sure to wash both sides of the screen thoroughly to ensure that all of the unexposed emulsion is removed.
Once the screens have been washed out, allow them to dry completely before moving on to the next step. It is important to inspect the screens for any imperfections or pinholes in the stencil, as these can affect the quality of the print. If any imperfections are found, they can be touched up with screen filler or blockout to ensure a clean print.
In conclusion, proper screen preparation techniques are essential for achieving high-quality prints with a 4 color 1 station system. By following these steps and taking care to clean, coat, expose, and wash out the screens properly, you can ensure that your prints are crisp, clear, and professional-looking. Remember to take your time and pay attention to detail, as the quality of your prints will ultimately depend on the care and precision with which you prepare your screens.
Ink Mixing and Color Matching Tips
Screen printing is a popular method for creating high-quality prints on various surfaces, from t-shirts to posters. One of the key components of successful screen printing is ink mixing and color matching. With a 4 color 1 station system, it is essential to follow best practices to achieve accurate and consistent colors in your prints.

When it comes to ink mixing, it is crucial to start with high-quality inks that are designed for screen printing. These inks are specifically formulated to provide vibrant colors and excellent adhesion to the substrate. Before mixing your inks, make sure to thoroughly stir each color to ensure a smooth consistency. This will help prevent any clumps or streaks in your prints.
To achieve accurate colors, it is important to follow a precise formula for mixing your inks. Start by measuring out the exact amounts of each color according to your desired color recipe. Use a scale to ensure accuracy, as even small variations in ink ratios can result in noticeable differences in color. It is also helpful to keep detailed records of your ink mixing process, including the specific amounts of each color used, to replicate colors in future print runs.
Color matching is another critical aspect of screen printing with a 4 color 1 station system. To ensure consistent colors across your prints, it is essential to use a color matching system, such as Pantone or CMYK. These systems provide standardized color codes that can be used to accurately reproduce colors in your prints. When selecting colors for your design, refer to these color codes to ensure that your prints match your intended color palette.
When mixing colors to match a specific shade, it is helpful to start with a base color and gradually add small amounts of other colors to achieve the desired hue. Keep in mind that some colors may require more or less ink to achieve the desired shade, so it is important to experiment and make adjustments as needed. It is also helpful to test your color mixes on a sample substrate before printing your final design to ensure that the colors are accurate.
In addition to ink mixing and color matching, proper ink curing is essential for achieving durable and long-lasting prints. After printing your design, it is important to cure the ink using a heat press or conveyor dryer. Follow the manufacturer’s instructions for curing times and temperatures to ensure that the ink properly adheres to the substrate. Improper curing can result in ink flaking or fading over time, so it is crucial to pay close attention to this step in the screen printing process.
In conclusion, ink mixing and color matching are essential components of successful screen printing with a 4 color 1 station system. By following best practices and using high-quality inks, precise color formulas, and standardized color codes, you can achieve accurate and consistent colors in your prints. Remember to keep detailed records of your ink mixing process and test your colors before printing your final design. With proper ink curing, you can create vibrant and durable prints that will impress your customers and stand the test of time.
Registration and Alignment Methods
Screen printing is a popular method for creating high-quality prints on various surfaces, from t-shirts to posters. When using a 4 color 1 station system, it is essential to pay close attention to registration and alignment to ensure that the colors are properly lined up and the final print looks professional. In this article, we will discuss some best practices for registration and alignment methods when using a 4 color 1 station system.
One of the most common methods for achieving accurate registration and alignment is using registration marks. These marks are typically small, cross-shaped targets that are printed on each screen. By aligning these marks with each other, you can ensure that the colors are properly lined up on the final print. When using registration marks, it is important to make sure that they are placed in the same location on each screen and that they are easily visible when aligning the screens.
Another method for achieving accurate registration and alignment is using a registration jig. A registration jig is a tool that holds the screens in place and ensures that they are properly aligned. By using a registration jig, you can quickly and easily set up the screens for printing, saving time and reducing the risk of errors. Registration jigs are especially useful when printing multiple colors or designs with tight registration requirements.
In addition to using registration marks and registration jigs, it is important to take your time when setting up the screens for printing. Rushing through the registration and alignment process can lead to mistakes and poor print quality. Make sure to double-check the alignment of each screen before printing to ensure that the colors are properly lined up.
When printing with a 4 color 1 station system, it is also important to consider the order in which you print the colors. The general rule of thumb is to print the lightest colors first and the darkest colors last. This helps to prevent the darker colors from overpowering the lighter colors and ensures that the final print looks vibrant and balanced.
When printing multiple colors, it is important to use a squeegee that is the appropriate size for the design. A squeegee that is too small may not cover the entire design, leading to incomplete prints. On the other hand, a squeegee that is too large may apply too much pressure, causing the colors to bleed or smudge. Experiment with different squeegee sizes to find the one that works best for your design.
In conclusion, achieving accurate registration and alignment is essential when screen printing with a 4 color 1 station system. By using registration marks, registration jigs, and taking your time during setup, you can ensure that the colors are properly lined up and the final print looks professional. Remember to print the colors in the correct order, use the appropriate squeegee size, and double-check the alignment before printing. With these best practices in mind, you can create high-quality prints with your 4 color 1 station system.
Pre: Enhancing Precision with 4 Color 1 Station Screen Printing Press with Micro Registration
Next: Understanding the Basics of Screen Printing 4 Color 1 Station Setup
Tags: