Beginner’s Guide to Operating a 2 Station Screen Printing Press
Setting Up Your Screen Printing Station
Screen printing is a popular method of printing designs onto various surfaces, such as t-shirts, posters, and bags. If you are new to screen printing and looking to set up your own printing station, a 2 station screen printing press is a great place to start. In this beginner’s guide, we will walk you through the process of setting up your screen printing station and getting started with your printing projects.
The first step in setting up your screen printing station is to find a suitable location for your press. You will need a space that is well-ventilated and has access to electricity. It is also important to have a sturdy table or workbench to mount your press on. Make sure the table is at a comfortable height for you to work at and has enough space for your press and other printing supplies.
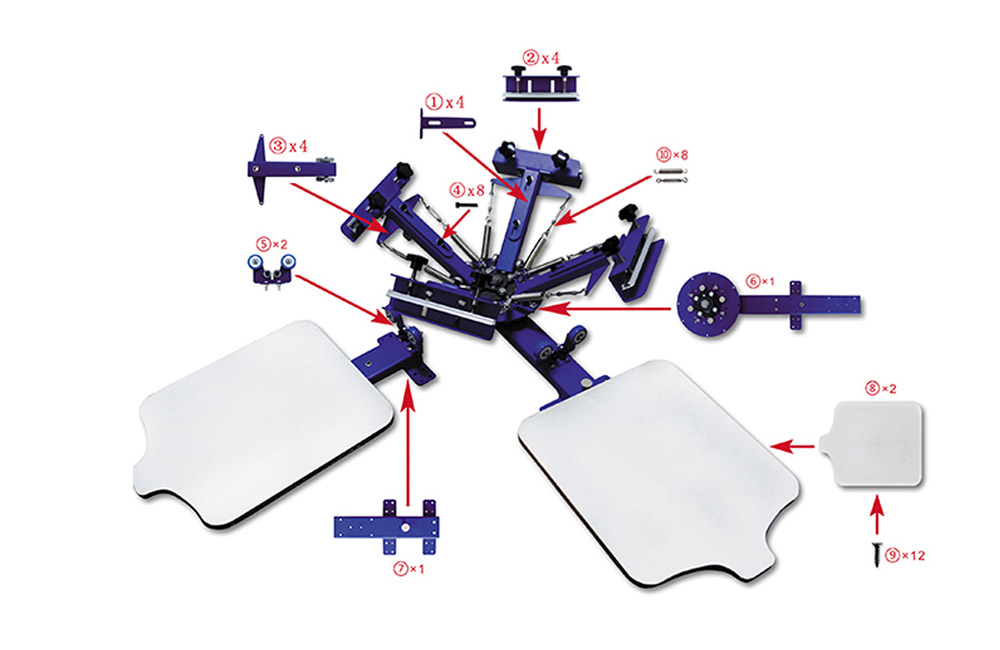
Once you have found a suitable location for your screen printing station, it is time to assemble your 2 station screen printing press. Most presses come with detailed instructions on how to assemble them, so be sure to follow these carefully. Make sure all the parts are securely attached and that the press is stable before moving on to the next step.
Next, you will need to set up your screens and squeegees. Screens are used to transfer the design onto the printing surface, while squeegees are used to push the ink through the screen. To set up your screens, you will need to coat them with emulsion and let them dry before attaching them to the press. Make sure the screens are securely fastened to the press and that they are aligned properly.
Once your screens are set up, it is time to prepare your ink. Screen printing ink comes in a variety of colors and consistencies, so be sure to choose the right ink for your project. Mix the ink thoroughly before loading it onto the screen. Use a spatula or scoop coater to apply the ink to the screen, making sure to spread it evenly across the design.
With your screens, squeegees, and ink all set up, it is time to start printing. Place the printing surface (such as a t-shirt or poster) onto the platen of the press and lower the screen onto the surface. Use the squeegee to push the ink through the screen and onto the surface, making sure to apply even pressure. Lift the screen carefully to reveal your printed design.
After printing your design, be sure to clean your screens and squeegees thoroughly to prevent the ink from drying and clogging the screen. Use a screen cleaner or emulsion remover to clean the screens, and a solvent or ink remover to clean the squeegees. Store your screens and squeegees in a cool, dry place to prevent them from warping or becoming damaged.
In conclusion, setting up a 2 station screen printing press is a great way to get started with screen printing. By following these steps and taking care of your equipment, you can create beautiful prints and expand your printing skills. With practice and dedication, you can become a proficient screen printer and create stunning designs for all your printing projects.
Pre: Why a Tabletop Screen Printing Press Is Ideal for Hobbyists
Next: Best 4 Color Silk Screen Printing Machines for Apparel Printing
Tags: