A Complete Guide to Using a Micro Adjustable 4 Color 4 Station Screen Printing Machine
Setting Up Your Micro Adjustable 4 Color 4 Station Screen Printing Machine
Setting up a micro adjustable 4 color 4 station screen printing machine requires careful attention to detail and a systematic approach to ensure optimal performance. To begin, it is essential to select an appropriate workspace that is clean, well-lit, and spacious enough to accommodate the machine and the materials you will be using. A sturdy, level table or workbench is ideal, as it provides a stable foundation for the machine, which is crucial for achieving precise prints.

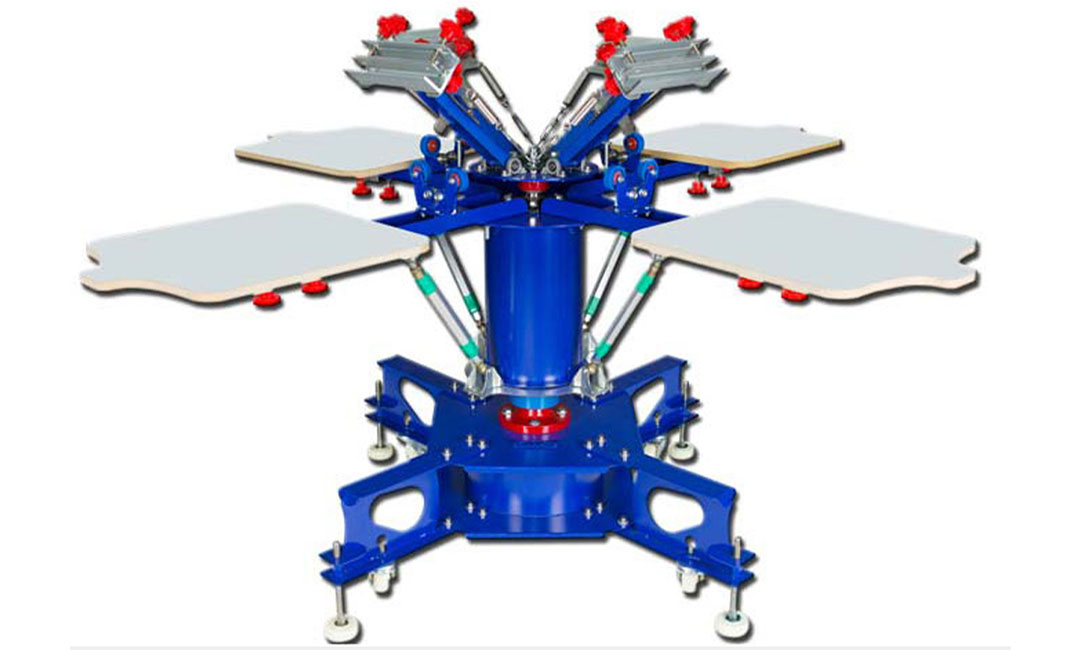
Once you have chosen the right location, the next step involves assembling the machine. Most micro adjustable screen printing machines come with a detailed instruction manual that outlines the assembly process. It is advisable to follow these instructions closely, as each machine may have specific components and assembly requirements. Begin by attaching the base to the main frame, ensuring that all screws and bolts are tightened securely. After the base is in place, proceed to install the print heads and the platens, which are the surfaces on which the garments will be printed. It is important to ensure that the print heads are aligned correctly to avoid misprints.
After the machine is assembled, the next phase is to set up the screens. This involves selecting the appropriate mesh count for your project, as different mesh counts will yield different results based on the type of ink and design you are using. Once you have chosen the screens, secure them onto the print heads using the clamps provided. It is crucial to ensure that the screens are tightly fastened to prevent any movement during the printing process, which could lead to blurred or misaligned prints.

With the screens in place, you can now move on to the registration process. Proper registration is vital for multi-color printing, as it ensures that each color aligns perfectly with the others. To achieve this, you will need to adjust the micro registration knobs on the machine. These knobs allow for fine-tuning of the screen position, enabling you to make minute adjustments to achieve precise alignment. It is advisable to perform a test print on a scrap piece of fabric to check the registration before proceeding with your actual prints. This step not only saves materials but also helps in identifying any potential issues that may arise during the printing process.
Once registration is confirmed, the next step is to prepare your inks. Choose high-quality inks that are suitable for the fabric you are printing on, as this will significantly impact the final result. Mix the inks thoroughly to ensure consistency in color and viscosity. After preparing the inks, pour them onto the screens, ensuring that there is enough ink to cover the design adequately.
Finally, it is time to begin printing. Start by lowering the print head onto the garment and applying even pressure to ensure a consistent print. After printing the first color, lift the print head and allow the ink to dry before moving on to the next color. Repeat this process for each color, making sure to maintain proper registration throughout. Once all colors have been printed, allow the garment to cure according to the ink manufacturer’s instructions to ensure durability.
In conclusion, setting up a micro adjustable 4 color 4 station screen printing machine involves a series of methodical steps that, when followed carefully, can lead to successful and high-quality prints. By paying attention to the assembly, screen setup, registration, ink preparation, and printing process, you can maximize the potential of your screen printing machine and achieve professional results.
Pre: 4 Color 4 Station Screen Printing T-Shirt Machine: USA-Made Quality and Performance
Next: How to Get the Best Results with a Lick 4-Color Garment Screen Printing Machine
Tags: